It all comes down to the harvest. Croptracker aims to make this - the most important few weeks of your year - easier to manage, safer for your team, and more profitable by eliminating errors and delays. In this blog post, we go over everything you need to know about harvesting with Croptracker via the desktop app. (See our next post for how to harvest via the mobile app!)
Harvest Event Wizard
Let's jump straight in.
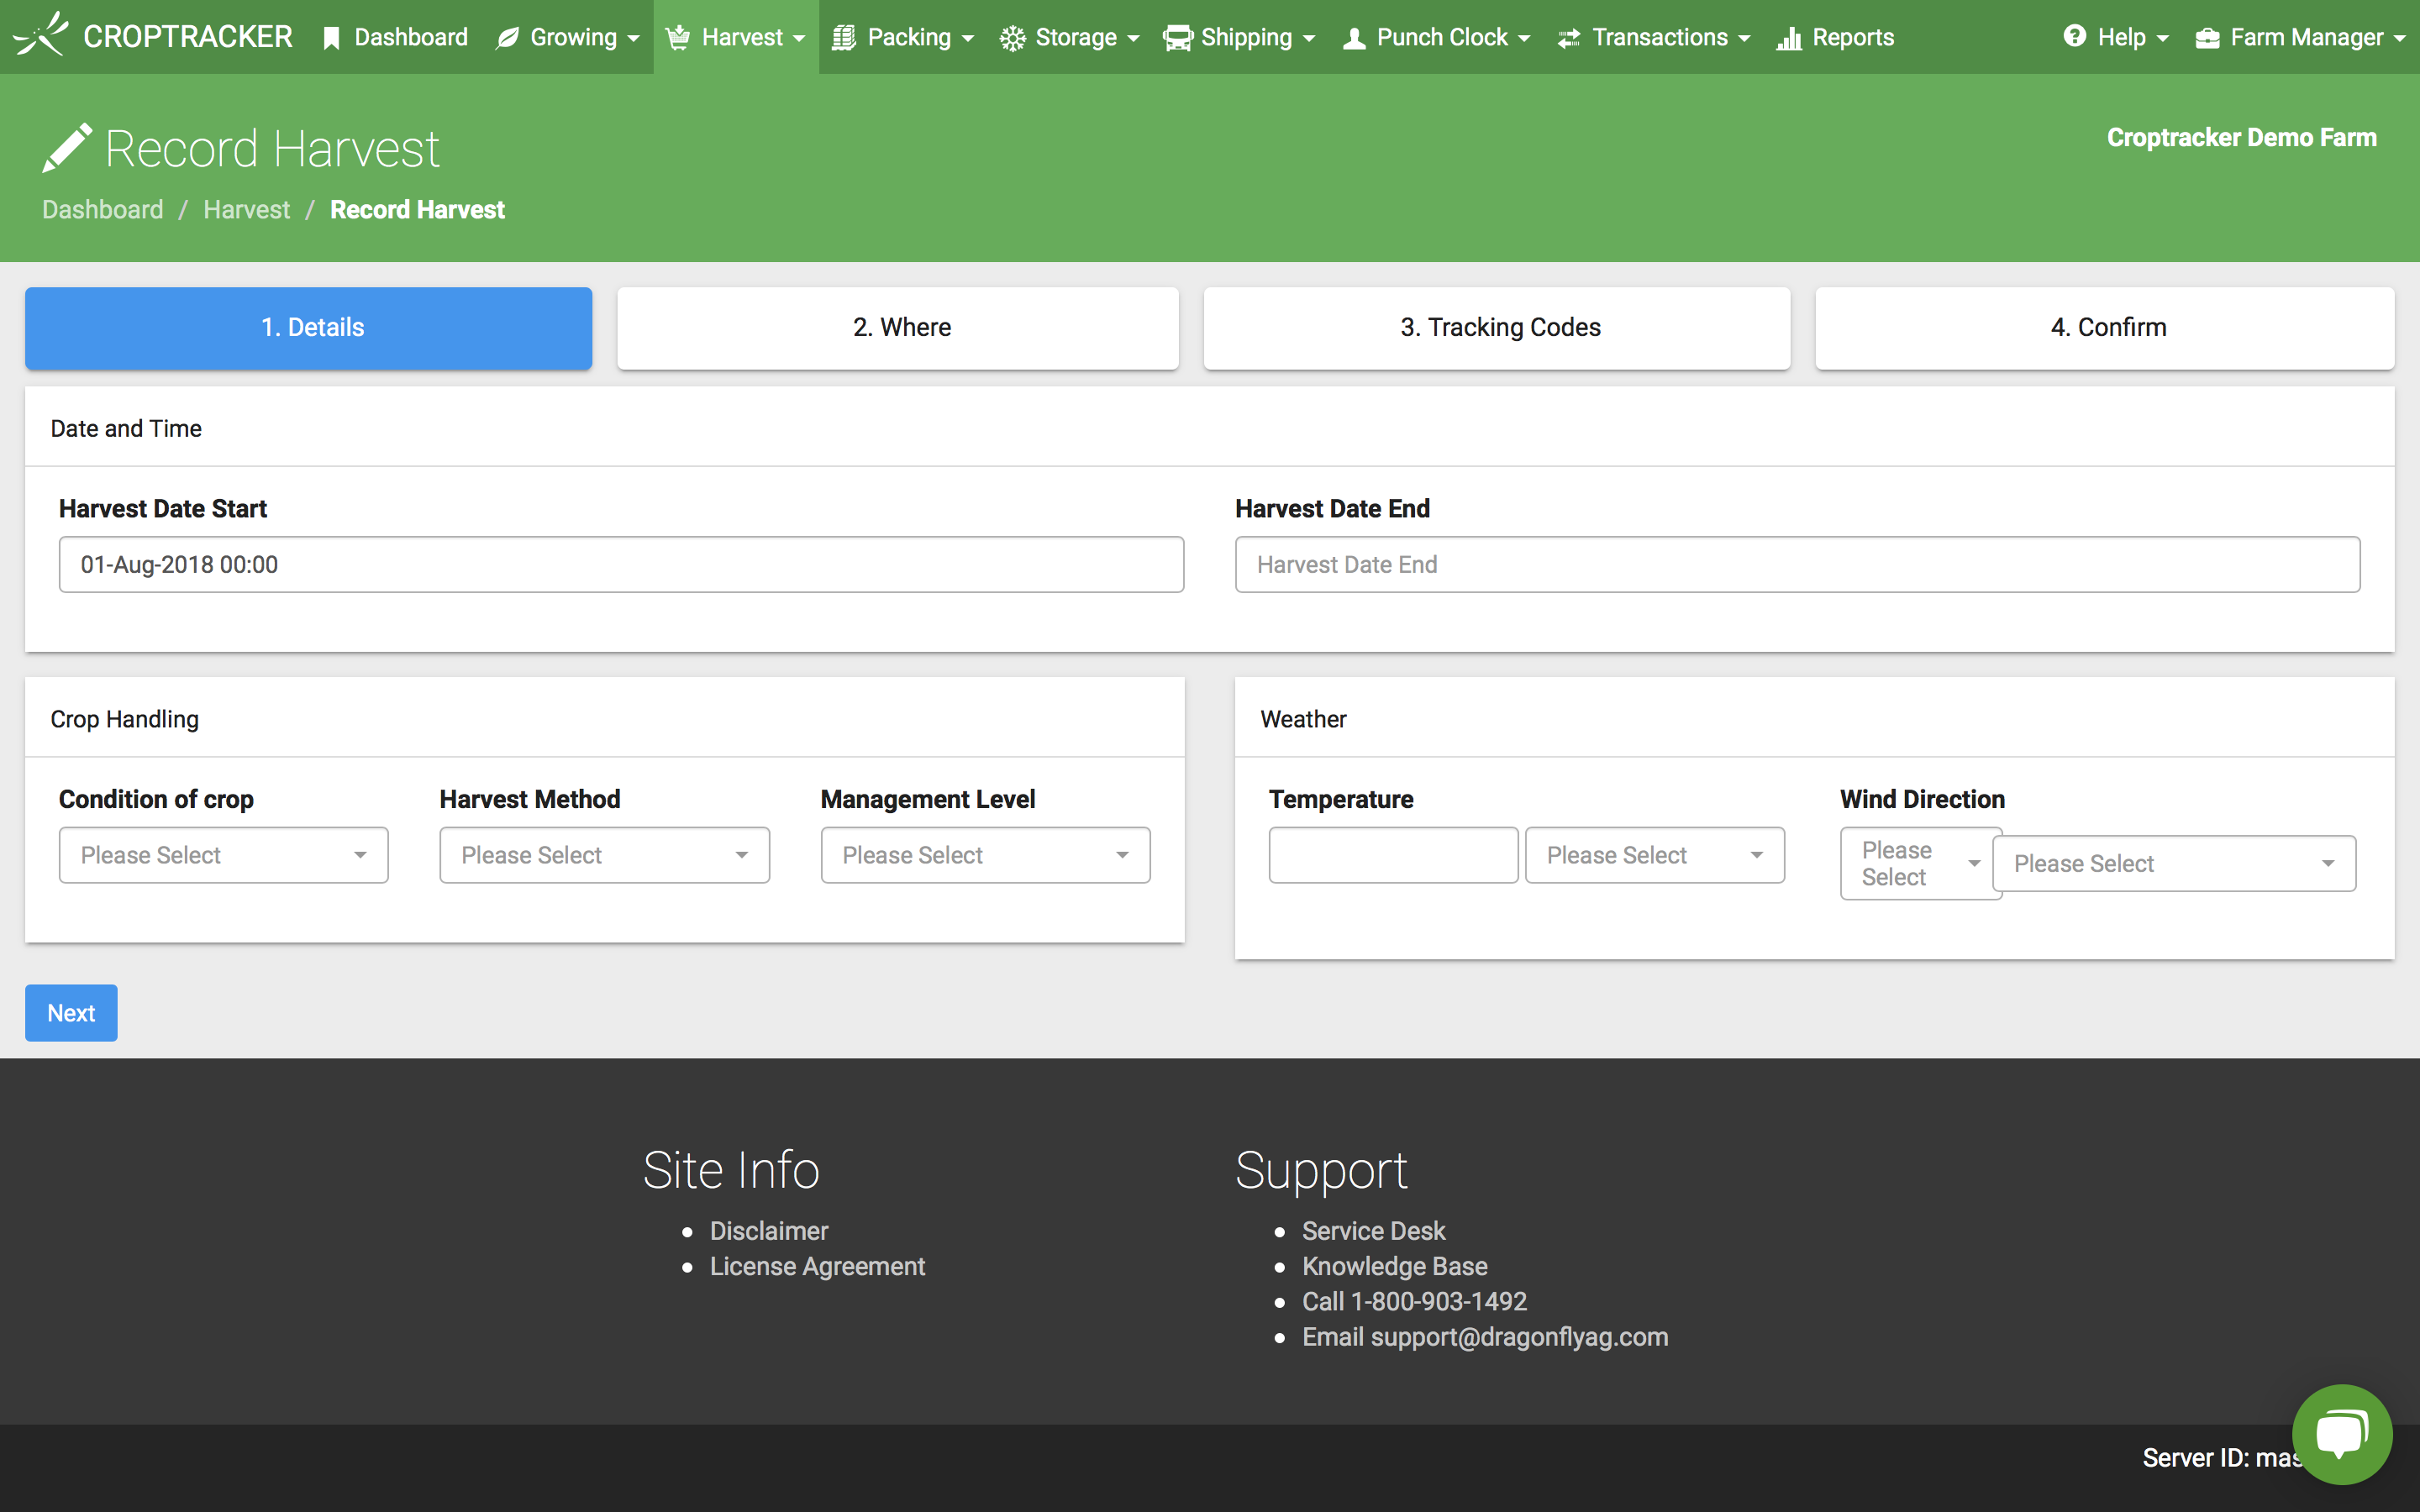 From the dashboard click the New Harvest button. Or, click the Harvest menu item at the top of the page and click Record Harvest. This will take you to the harvest wizard.
-
Select the start date and time of this harvest event in the Harvest Date Start input box. Optionally enter a Harvest Date End.
- You may also enter other optional fields, Condition of Crop, Harvest Method, Management Level, Temperature, and Wind Direction.
- To continue click the Next button click the Where tab.
-
To select the blocks you plan to harvest click the blocks on the map, or click the checkboxes below the map.
As a precaution to protect worker health & safety, blocks may appear yellow or red if they have not passed the pre-harvest interval or re-entry interval of previously sprayed chemicals.
- To continue click the Next button or click the Tracking Codes tab.
-
To generate tracking codes click the button with the tags icon next to Harvest Code. Or enter your own tracking codes in the input box next to each block.
This page will also show you if the pre-harvest interval and the re-entry interval have passed for each selected block. If either the PHI or REI intervals have failed check your harvest date is beyond any PHI or REI of any chemical previously sprayed on the selected blocks. See PHI/REI (Pre-Harvest Interval/Re-Entry Interval) on our Knowledge Base for more information.
- To continue click the Next button or click the Confirm tab.
- Optionally enter the Responsible Person and any applicable Comments or Notes.
-
When finished click the Save and Continue to Inputs button. You can also click the Save button and return to the dashboard if you are preparing your harvest event for a later time.
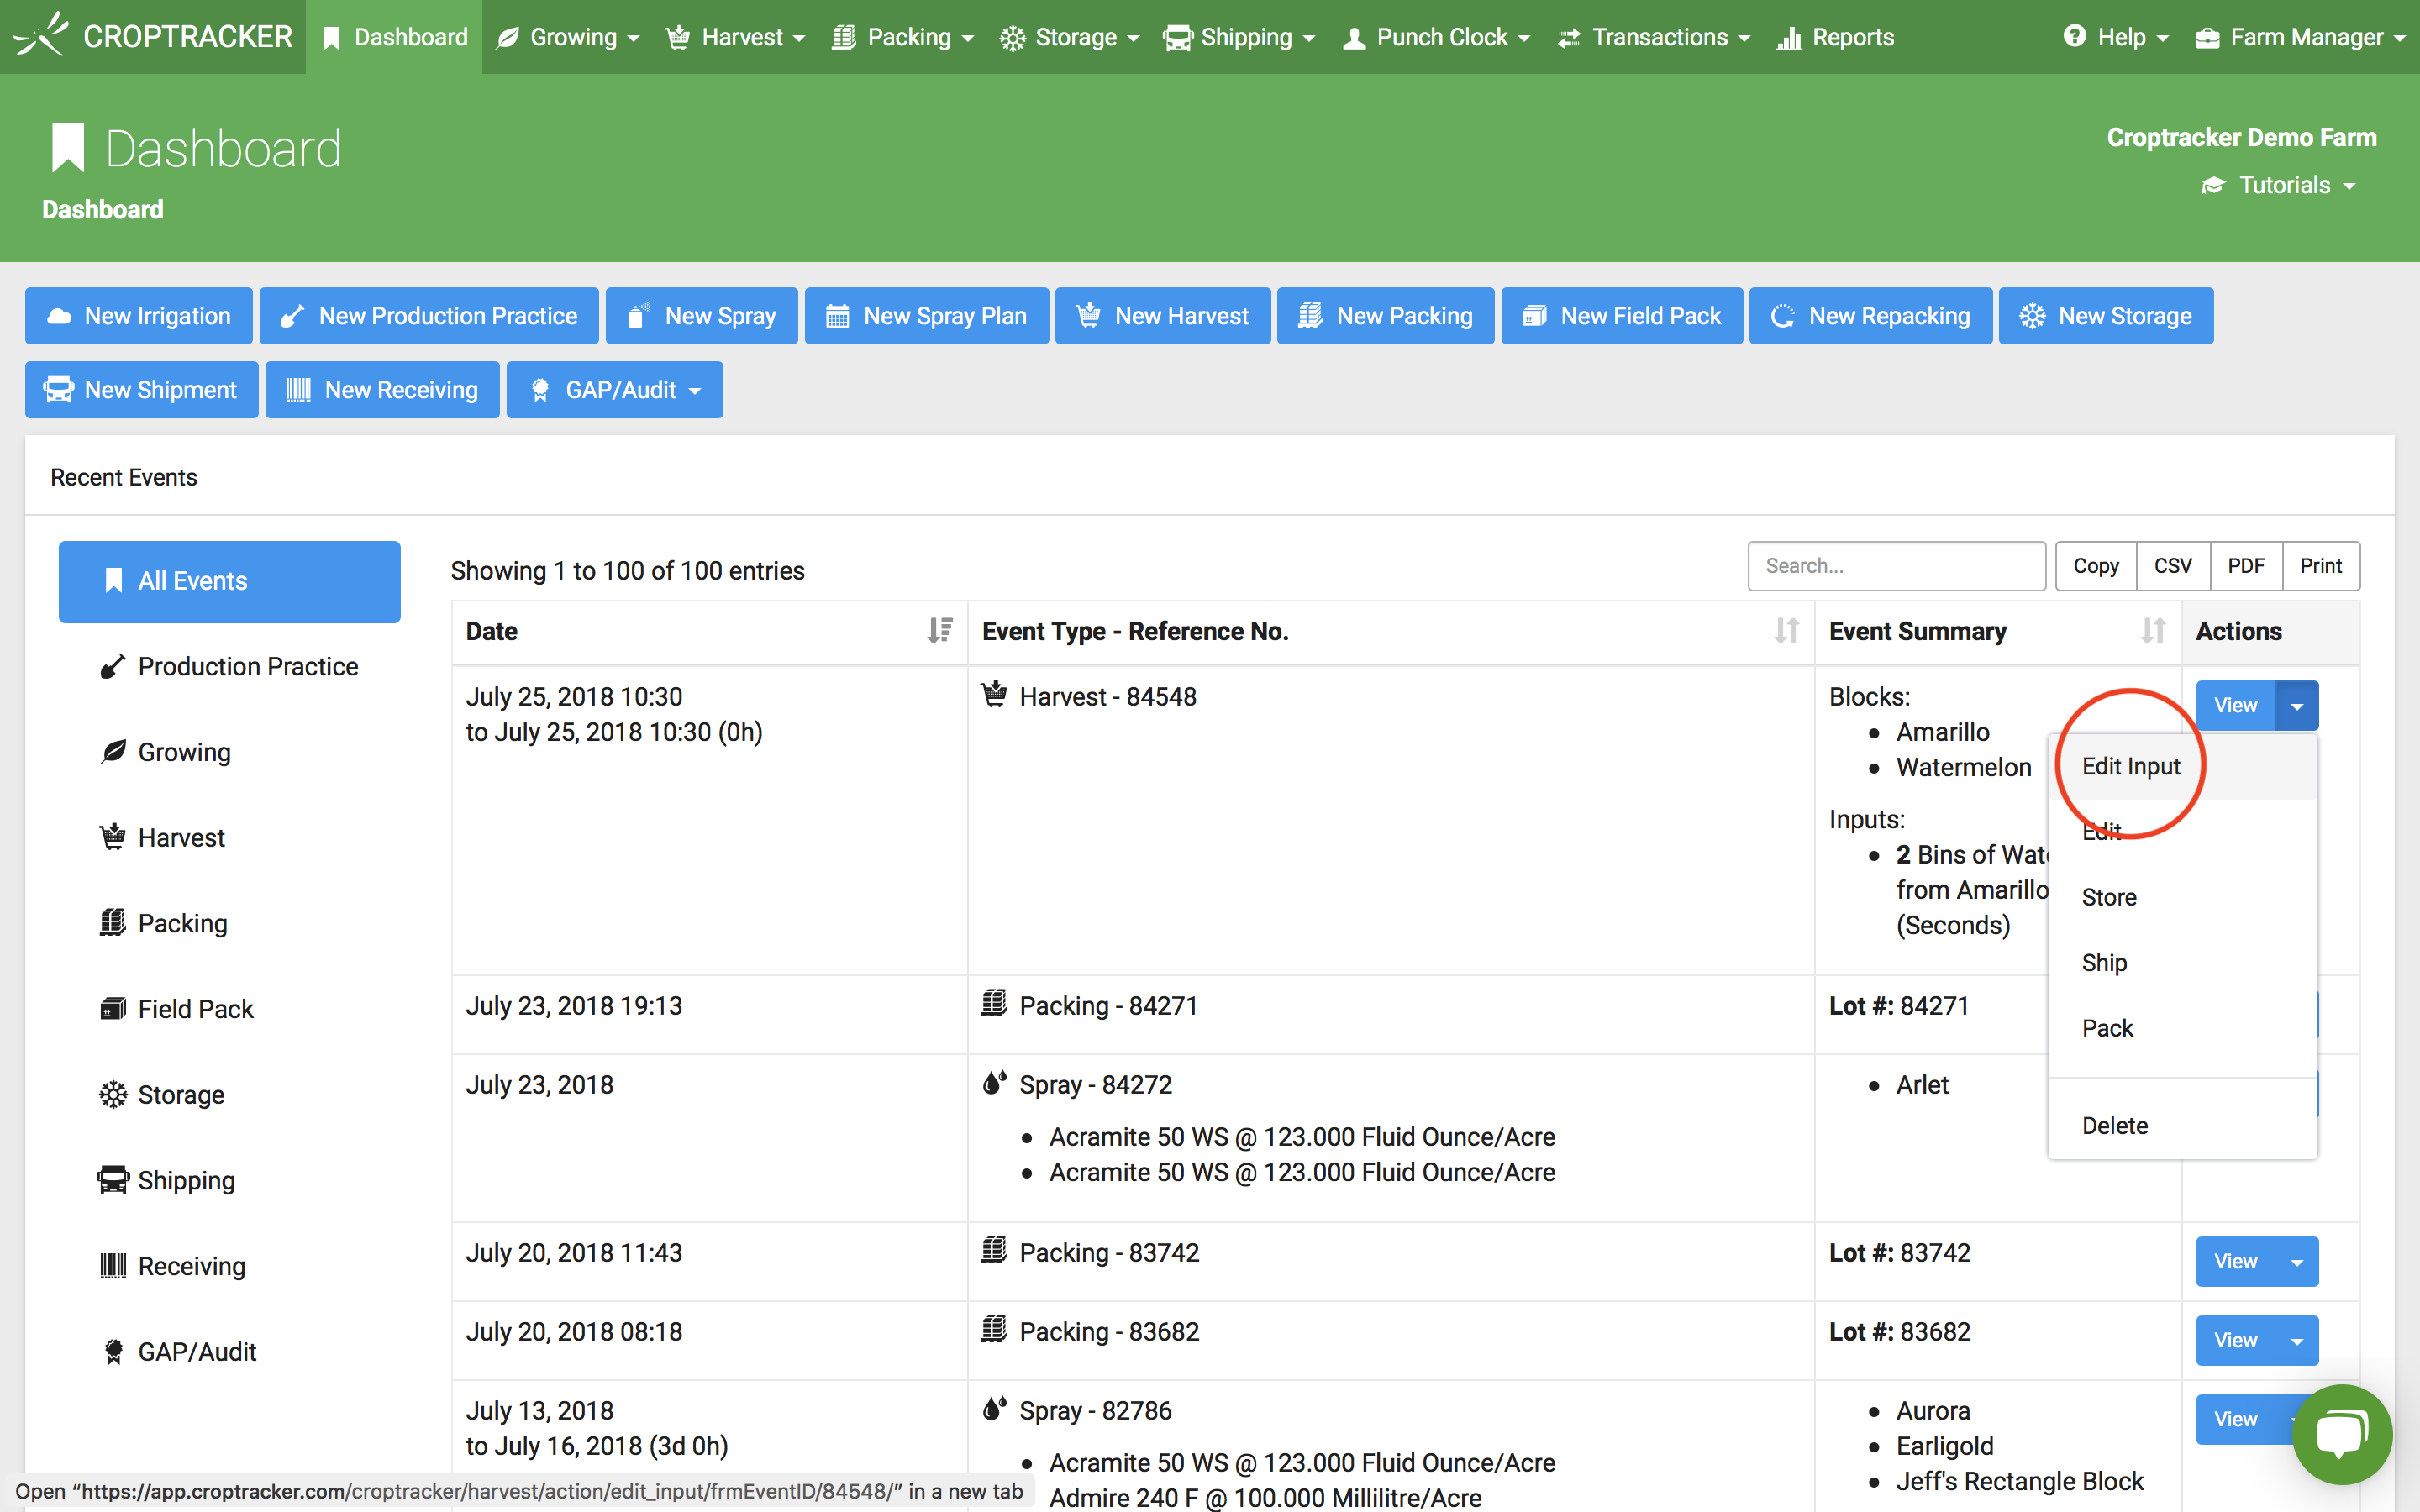
You can edit or delete this event from the event dashboard. To go to the dashboard click the Dashboard menu item at the top of the page. Find your harvest event in the Recent Events list (you can filter by Harvest to only show harvest events). Click the View button next to your event to open the wizard. Or click the dropdown next to the View button for additional actions.
Recording Harvest Inputs
Once you have a Harvest Event set up for your block(s), you can proceed to record your harvest inputs from those block(s).
 To open the Harvest Inputs screen:
From the dashboard click the dropdown next to the desired
Harvest Event and click the Edit Input action.
To open the Harvest Inputs screen:
From the dashboard click the dropdown next to the desired
Harvest Event and click the Edit Input action.
-
Or, from the harvest event wizard click the Confirm tab and click the Save and Continue to Inputs button.
If you do not see any blocks or + Add Input buttons on this page you did not have any blocks selected for this harvest event. Click the Edit Harvest Setup button to return to the harvest wizard to select your blocks.
 Follow these steps for each load as it arrives into your
processing or storage facility:
Follow these steps for each load as it arrives into your
processing or storage facility:
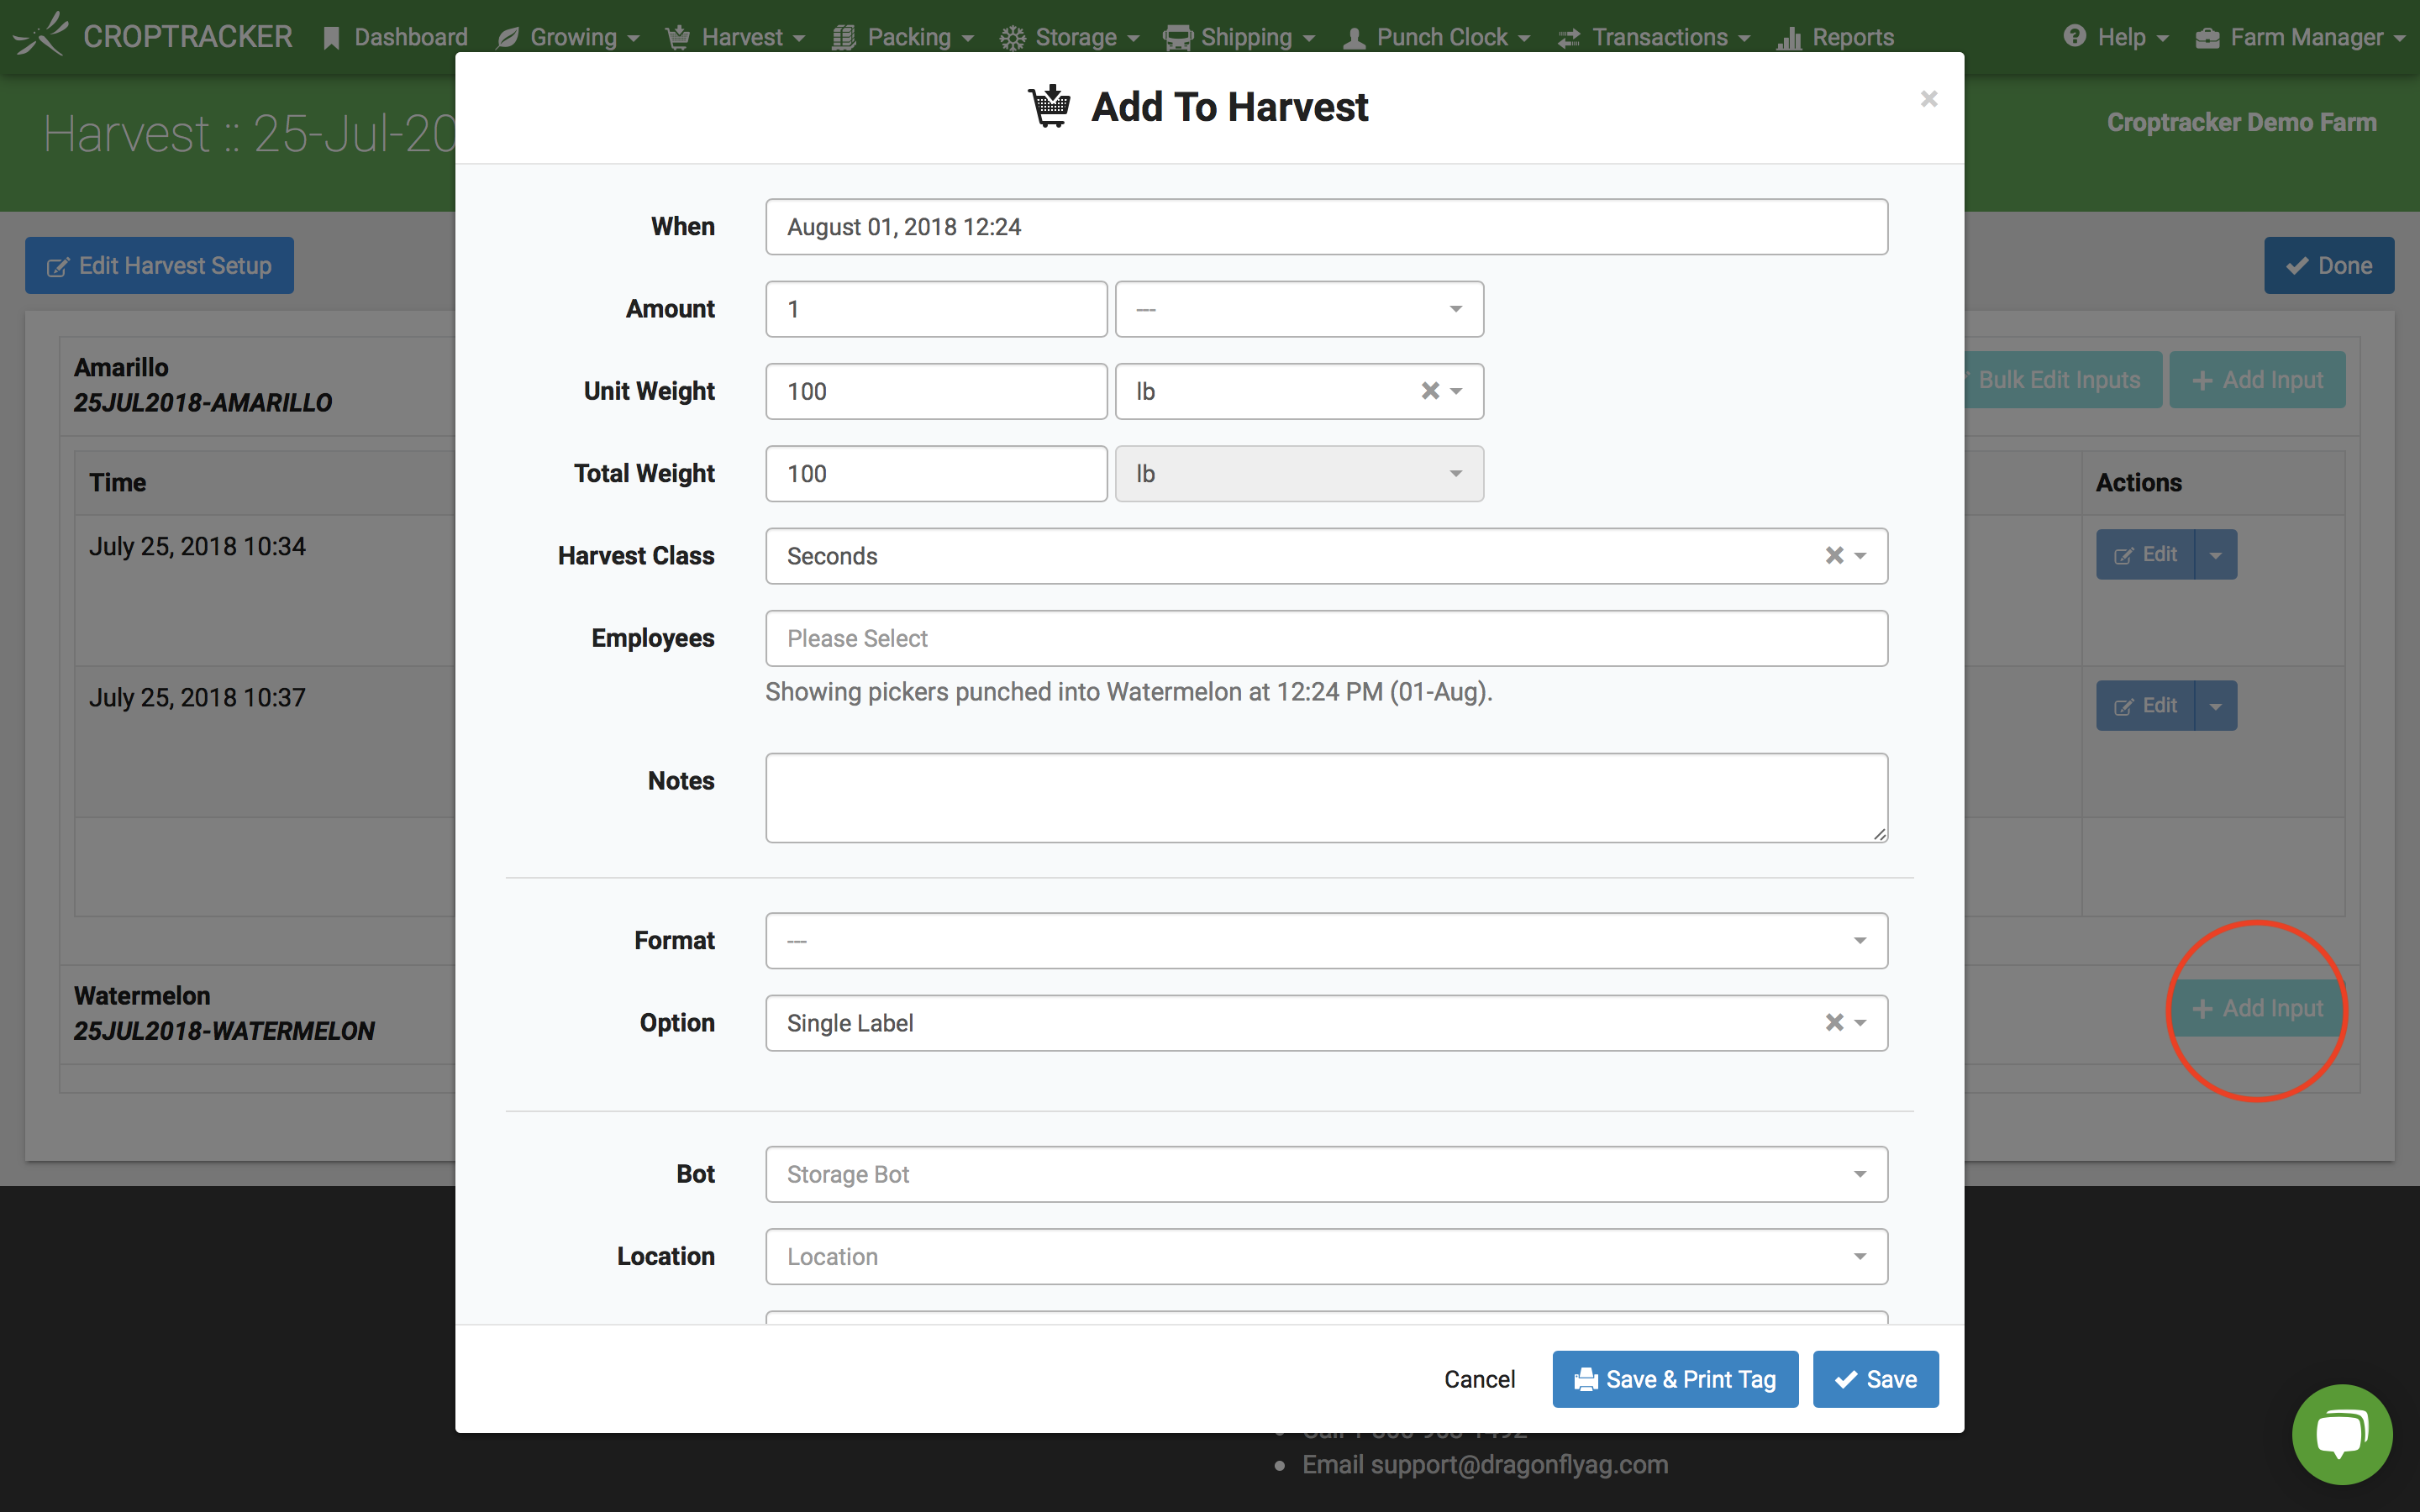
- Click the + Add Input button next to the block the incoming load is from (in our example seen on the right, the incoming load is coming from the Watermelon block).
- Select the date and time in the When input box (defaults to current date and time).
- Enter the number of units for this load in the Amount input box. Then select the unit type (bins, totes, etc) in the input box next to the amount.
- Select the Unit Weight and unit weight type (lbs, kgs, etc). The total weight will be calculated automatically.
- Optionally enter Size, Work Crew, and application Notes.
- Select a label format in the Format drop down.
-
Optionally specify either Single Label
or Multiple Labels and Units Per Label.
- Single Label will print one label for the entire load.
- Multiple Labels will print one label for each set of Units Per Label (e.g. If your load is 4 bins and you specify 2 units per label it will print 2 labels.)
- If this load is going into storage you can specify the Location, Aisle, Row, and/or Rack. This will automatically generate a storage event for you and put the load into storage.
- Click the Save & Print Tag button.
-
Print the tag and affix if to the incoming load.
You can scan the barcode on the harvest tag with the Croptracker Mobile App. This allows you to quickly retrieve information on the load and store, pack, or ship the load.
Want to learn how to execute your harvest with Croptracker via our mobile app? See our next blog post here.
Need a refresher on any of Croptracker's features? Head over to our Knowledge Base, where you'll find step-by-step tutorials as well as common troubleshooting tips and more. And as always, if you're ever stuck, never hesitate to e-mail us at support@croptracker.com or Live Chat with us by clicking the green speech bubble
 in your bottom right-hand corner. We're
always happy to help you let Croptracker make your
farm become more efficient, safe, and profitable!
in your bottom right-hand corner. We're
always happy to help you let Croptracker make your
farm become more efficient, safe, and profitable!
Missed Last Week's Blog Post?
Getting Ready To Pack With Croptracker